Facial Steps: How to Do an At Home Facial Procedure (Basic Professional Process)

We don’t know one woman that can resist an hour or two of pampering every once and a while.
Whether at home or at your local spa, giving your skin that extra TLC with a facial is what will keep it plump, taut, and radiant for years to come. So, what is a facial?
Whether performed by an esthetician or as a facial at home, the procedure leaves your skin clean, hydrated, and nourished. It's an important part of a good skin care regimen that rids your face of old skin cells leaving space for new ones to take over. Aside from the obvious benefit of glowing skin, a professional facial can relieve stress, providing you with a new sense of relaxation and calm.
There is nothing better than getting home from the spa looking and feeling your best from some serious skincare products. But, did you know that you can give yourself a DIY facial with the help of some products from your bedroom and medicine cabinet?
That’s right, in this article, we’re going to give you a step by step guide with 10 easy facial steps to help you achieve the glowing skin that you deserve!
Basic Facial Steps Explained
Ready to learn how to do a facial treatment at home without going to your local spa or esthetician? If so, slip into your favorite bathrobe, wrap a towel around your hair, and get ready to enjoy a spa-like facial treatment from the comforts of your living room with this guide:
Step 1: Don’t Forget to Create the Right Ambiance
Today, we’re constantly surrounded by noise, devices, people, and a mound of distractions and stressors, so what better way to relax than by turning your home into a personalized spa?
The first step to your DIY facial treatment is creating the right ambiance. Crystals, candles, music, incense, or essential oils are all great ways to create a relaxing, spa-like atmosphere. You could even put some relaxing music on or run a warm bath with some Epsom salts. Use whatever you have in your home to help you feel nice and calm.
Remember, the idea is to make sure that you're as comfortable as possible so slip into something relaxing, and check your hair isn't pull back too tight and that you don't have strands of hair that could get in the way when applying products to your skin.
Step 2: Remove Any Makeup & Cleanse Your Skin
During the next step of your facial, your esthetician would usually make sure that they have a clear canvas to work on. So, before you get started, it’s important that you remove any makeup and other cosmetics with the use of a high-quality cleanser. If you skip this part, you could do more harm than good as you’ll be trapping old makeup and residue into your pores which could lead to breakouts and other skin concerns.
For a proper double cleanse, start by thoroughly wiping your face with a cleansing wipe. Then, with a facial oil like olive or coconut oil and some cotton pads, gently wipe your face again. To ensure your skin is clear, give your face one last wipe with a chemical-free cleanser and wash it off with warm water before dabbing your face dry with a towel.
When your skin is completely clear, you can perform an at-home skin analysis. One of the reasons spa professionals perform these analyses is to ensure they choose the correct products to use during your facial treatment. And, just because you're at home doesn't mean you shouldn't take care of your skin in the same way they do at your local spa. Some products can be harsh on sensitive skin, so check for blemishes, irritation, and keep your skin's specific sensitivities in mind when performing your DIY treatment.

Step 3: Exfoliate Your Face
Exfoliating is an extremely important part of a facial as it helps remove dead skin cells. You can use either physical scrubs or chemical exfoliators to achieve that polished and brightened skin tone you’ve been longing for! So, the next step is to use a small amount of your favorite exfoliating facial scrub and rub it in gentle circular motions on your skin. This is especially beneficial if you have oily skin, as it helps remove excess oil and unclog pores for a clearer complexion.
Don't forget to give your nose and chin special attention to remove any impurities and whatever you do, don’t skip your neck area!
Step 4: Do a Facial Steam
When it comes to learning about at home facial steps, nothing says clean pores better than a facial steam! While your esthetician would normally have a steam machine specifically designed for this stage, all you have to do is prepare a big bowl of hot, steaming water with your favorite herbs, botanicals, or a few drops of essential oil. Then, place your face over the steam and drape a towel over your head. Enjoy the steam for 10 to 15 minutes.
The steam will soften your hair follicles and open up your pores, allowing your skin to truly breathe. Aside from its relaxing properties, steam also adds an extra layer of moisture to your skin.
Spas and professional estheticians often perform a gentle enzyme treatment during the steam. These products are available from a variety of manufacturers and help remove dead skin cells while also promoting blood circulation. They're great at taking care of your skin if you suffer from acne or would like to reduce the visibility of fine lines and wrinkles.
Step 5: Give Yourself a Facial Massage
Just because you’re following these facial steps at home without your esthetician to help doesn’t mean you can’t go the whole nine yards with some self-massage! A facial yoga is just another way to put you in a deep state of relaxation. Did you know that a facial massage can also relieve tension and stress?
But, that’s not all a massage can do! Different massage techniques also increase oxygen and blood flow. A massage also stimulates your facial muscles, thus boosting collagen production and allowing you to maintain that youthful glow for longer!
Whatever you do, don't forget to massage every part of your face - not just the cheeks, forehead, and neck. It's important that you massage areas where you experience congestion and excess oil. A self-massage around the nasolabial folds and lips can increase circulation, helping your body push out toxins. A massage is also great for stimulating blood flow around the lips, leaving them nice and plump. To further increase oxygen and blood flow to the face, massage your neck with your fingertips, and work upwards towards your chin.
Step 6: Apply a Face Mask
After your massage, it's time for your face mask. Face masks can do everything from correcting skin concerns to improving your skin tone, texture, and moisture. It’s a must-have in every skincare regime, regardless of whether you’re performing a full facial or not.
While there are thousands of spas and estheticians offering these professional services, you can also create your own DIY sheet masks at home using simple ingredients. People create their own using household ingredients such as aloe vera, honey, coconut oil, egg white, avocado, essential oils, yogurt, and more. Take care when choosing your ingredients to ensure that you only choose those suited to your skin type.
At Taut, we believe women deserve to experience red carpet radiance without having to book an appointment with their local esthetician. That’s why we created our Taut Collagen Mask, a luxurious collagen peptide facial mask formulated to target dehydrated, dull-looking, and sagging skin.
Made with hydrolyzed collagen broken down into nano-sized molecules, our collagen masks penetrate into the deeper layers of your skin to give you an instant collagen boost. Better yet, we’ve added a dose of vitamin C, a co-factor of collagen that helps stimulate collagen production while also providing your skin with wound healing nutrients.
And, if all of the above isn’t enough, we added plant-sourced hyaluronic acid and squalene from olives to our facial mask. Known as a moisture magnet, hyaluronic acid improves skin moisture while strengthening the dermis. Combined, these two ingredients provide deep hydration and nourishment that won’t clog your pores or cause any irritation.
Step 7: Use Toner
Once your face mask has worked its magic and implanted all of its goodness into your skin, it’s time to clean and close up those pores. Toner will stop any grime from settling into your pores. It restores balance to your dermis and is great for acne-prone skin. The key is to avoid toners that contain alcohol as these can cause irritation.
All you have to do is dab some toner into a cotton pad and gently apply a thin layer to your face. While it dries, it’ll shrink and tighten your pores, leaving your face nice and taut.
Step 8: Apply Your Serum
It’s important that you follow the steps of a facial in the correct order. This is especially relevant to hyaluronic acid. Hyaluronic acid is the ‘it’ ingredient at the moment. It's present in many serums and can hold up to 1000 times its weight in water, allowing it to provide intense moisture to your skin.
But, when it’s applied to dry skin, it pulls moisture away, leaving your skin dehydrated and dull-looking. This is why you need to apply your serum before your moisturizer.
Our Taut Intense Recovery Face Serum is a great alternative that includes 7 powerful herbal extracts packed with anti-inflammatory and antioxidant properties. It hydrates, repairs, and protects your skin, providing you with a radiance that your makeup kit can’t.

Step 9: Don’t Forget Your Eye Cream
One of the biggest complaints most women have as they age is crows feet. But these little lines around our eyes appear when we don’t pay special attention to this area of our faces. Using high-quality, fragrance-free, and non-greasy eye cream as the next step during your facials will help reduce puffiness and dark circles. It’s also great for reducing fine lines and wrinkles.
Step 10: Moisturize
To wrap up the facial process, apply a soothing moisturizer or cream to your face. This final step to your spa-level facial will hydrate your skin, locking in all of the goodness from the previous facial treatment steps you’ve undertaken.
Choose a moisturizer that’s well suited to your skin type. If your goal is to reduce wrinkles and fine lines, choose a product with ingredients specifically designed to meet these needs. This doesn’t only apply to aging skin either! Whether you have dry skin, oily skin, combination, acne-prone, sensitive skin, or have experienced sun damage, choose a moisturizer that suits your skin type.
Professional Facial Steps You Should Avoid Doing Yourself
Your esthetician will often include steps to your facials that you shouldn't do at home unless you have the adequate training, experience, and equipment. Here are two of the most important ones:
Don’t Go Too Crazy During the Extraction Process
You’ve probably noticed that these basic facial steps don’t include an extraction. One of the reasons for this is that the extraction process should only be done by a trained esthetician or dermatologist with the correct tools, most notably a magnifying lamp. Without the right training and equipment, you could damage your skin.
Doing a DIY extraction and picking away at pimples and blackheads with your hands often leads to scarring. Worse yet, your hands are a breeding ground for bacteria which can cause an infection. While you can give it shot at home, we believe you’re less likely to scar or get an infection if you leave this step to your esthetician.
Limit the Number of Devices You Use During Your Facials
Have you kitted out your home with some equipment to give yourself the best facials possible? From LED lights to microcurrent devices, and even microneedling rollers, these devices can provide you with exceptional results - when used correctly by a trained esthetician!
More often than not, women that buy multiple devices assume that they can just use all of them at once to achieve their dream complexion, regardless of their skin type and condition. Unfortunately, this couldn’t be further from the truth.
Using numerous devices in one sitting can cause serious damage to the skin. Aside from the fact that you could end up needing a trip to the hospital, you may end up with permanent scarring.
The key is to limit yourself to one device per facial. Also, read the instructions carefully and test them on a small section of your skin before using them on your face. You could even talk to your esthetician about the risks and how to avoid them next time you see them.
Treat Your Skin From the Inside Out With Taut!
This facial step by step should equip you with the knowledge you need to get started from the comforts of your own home without having to book a visit to your esthetician or a trip to the spa. But, while facials can provide you with some exceptional results, it’s important that you combine them with the right skin care routine.
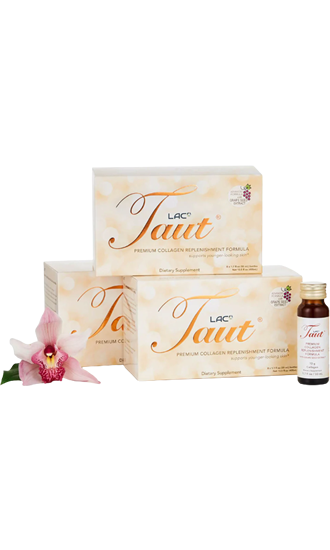
At Taut, we believe that the ingredients you put in your body are just as important as those you apply to your skin which is why we created our Taut Premium Collagen Intense Transformation Program.
It's developed to help you jumpstart and boost your body’s natural collagen production, Intense Transformation includes three boxes of Taut Premium Collagen Advanced Formula.
Designed to provide you with noticeable results in just 21 days, this formula can dramatically reverse the signs of aging, providing you with a fuller, firmer, and smoother complexion with fewer fine lines and wrinkles.
What makes this formula unique?
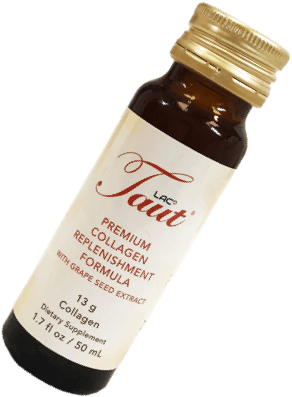
Made with the highest potency hydrolyzed collagen and elastin peptides sourced from red snapper wild-caught in the Indian ocean, the ingredients in this drink support skin elasticity while also providing you with a plumper look.
We know that without the right hydration, your skin can’t stay plump and luscious for long so we added a 10mg dose of hyaluronic acid to each serving. Thanks to its ability to hold water, this magical ingredient can strengthen the dermis while improving moisture.
Best of all, we included a healthy dose of powerful botanicals and nutrients to our collagen drink to ensure you enjoy healthy, hydrated, luminous, beautiful-looking skin for longer.
Some of these compounds include grape seed extract, a powerful antioxidant, vitamin C, a co-factor of collagen, ceramide, another important moisture-magnet, vitamin B6, and DNA from salmon.
Have questions about our Premium Collagen Advanced Formula? Get in touch with our team today!


